Adventures in Ploopy-land
Over the last decade, DIY or small-scale production mechanical keyboards have exploded in popularity. I'm hoping the Ploopy trackball is the start of a similar movement in pointing devices. Perhaps the custom keyboard movement has not yet extended to mice because programmers prefer to use them less! Perhaps it's just harder to design an ergonomic pointing device - all kinds of complex curves and angles.
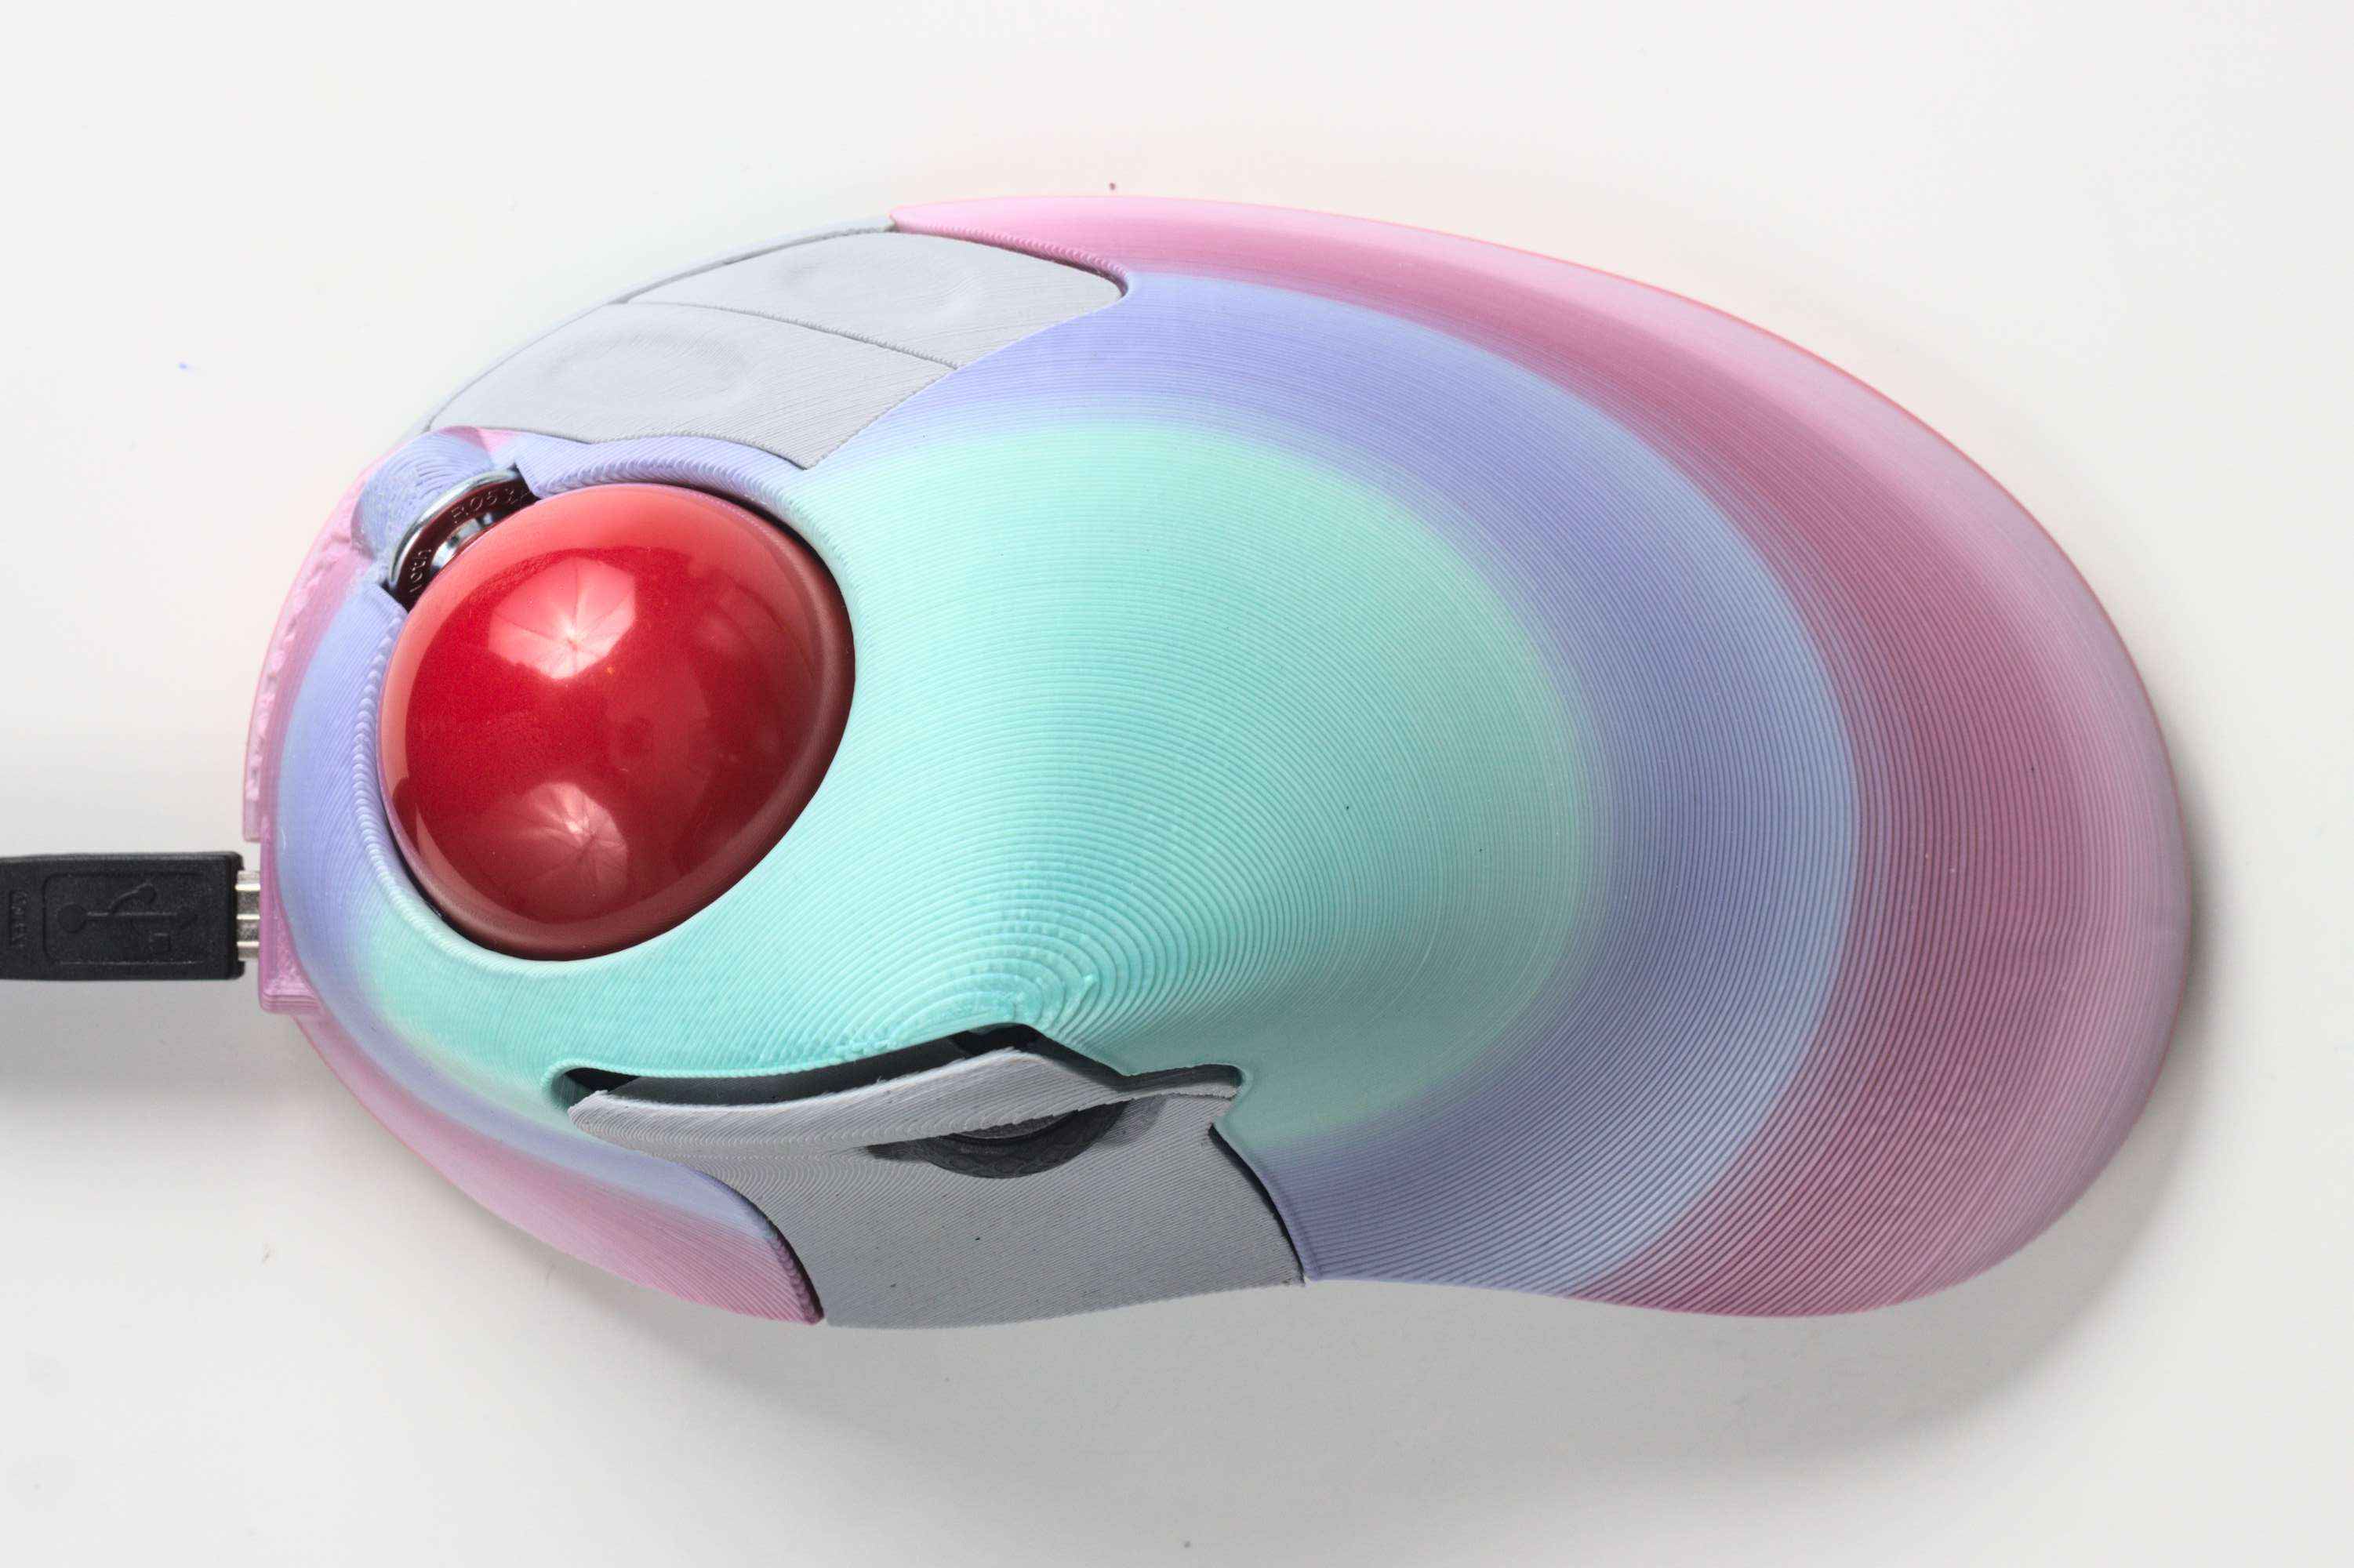
Whatever the reason, the Ploopy trackball could be a sign of things turning around. It's an ergonomic finger trackball designed and made in Canada. The code, 3D models and PCB files are all open-source and available on GitHub. Ploopy sells the trackball as a completed unit or as a kit you can assemble yourself, on their website. It's perfect for makers or tinkerers who want a pointing device that's as customisable and individual as their keyboard.
I bought one last year and I've been really enjoying it! The shape feels just right for my hand, similar to the Microsoft Trackball Explorer. It feels comfortable and not-scary-at-all to modify, thanks to the 3D-printed body and the readily available 3D models, firmware and schematics.
I only had one problem with the stock configuration. The way the bearings work created a slight but perceptible friction against the ball. As you roll the ball in all directions, it's always rolling non-parallel to at least two of them. That means the ball has to slide instead of rolling, creating noise and friction. More on that further down the page.
This page details my experiments with the trackball, trying out different options for improving the feel. First I'd like to make it clear that the feel as it came was already very nice! It just seemed like it could be improved further. Read on to discover how the original roller bearings compare to ceramic bearings and ball transfer units, as well as how the type of ball affects the feel.


Factors that affect trackball feel
During these experiments I've developed a mental model of three factors that you can feel when testing a trackball. Each has a different effect on how it responds to you moving the ball, and different people will have different preferences. I'm going to call these smoothness, static friction and rolling friction. There are other factors that affect the feel, but I think these are the main three when it comes to the bearings.
- Smoothness
- Smoothness is about the amount of roughness or bumps in the resistance to movement
- A smooth trackball might have noticeable resistance to turning, but it'll be consistent at all speeds and directions
- A trackball with low smoothness will feel “gritty” or “bumpy”
- Static friction (a.k.a stiction)
- Static friction is the resistance against movement when going from stationary to moving
- A trackball with low stiction will be easy to start turning with just a touch.
- Trackballs with high stiction feel “sticky” - you'll find yourself missing a button to one side and then the other as you overcorrect.
- Rolling friction (or kinetic friction, depending on bearing type)
- Rolling (or kinetic) friction is the resistance to movement when already moving
- Trackballs with low rolling friction will be easier to “flick” from one side of the screen to the other in a fast movement.
No trackball will have all three parameters just right for everyone. You might prefer a little bit of friction to reduce the amount you accidentally move the ball while clicking. You might prioritise smoothness over friction. It's all preference. So to help with that, I'll be rating each setup I've tested on all three scales.

Original roller bearings
The Ploopy, much like fancy CST trackballs, uses roller bearings to support the ball. These are standard ball bearings which rotate around one axis. They're each mounted on a 3D printed rod which is friction-fit into a notch in the top of the trackball.

Each bearing points in a different direction. That means whichever way you turn the ball, you can only ever turn it in line with one bearing. The ball has to be sliding or rubbing across at least two of them, and sometimes all three. That means that there's a bit of extra friction, and it varies depending on how well the rolling direction aligns with the bearings. You can see the effect of this when trying to move the pointer in circles. They'll be slightly misshapen by the changing rolling friction.

Upgrading the ball
Given that plenty of people consider roller bearings to be better than static bearings, what's the problem here? It seemed reasonable to investigate the ball next.
The ball that comes with the Ploopy is a pool ball, with a matte/satin surface. The slight roughness of the surface causes extra friction (both static and rolling). At 85g, it's a bit heavier than the ball of most trackballs. Both of those factors add to the friction against the roller bearings. The friction force is proportional to the ball's mass, and the coefficient of friction depends on the surfaces which are in contact. What we need to do is reduce the mass and the coefficient of friction.
First I thought it would be interesting to see if polishing the ball reduced the friction. It seems reasonable that a smoother ball would have less bumps and so less friction. I tried polishing it with blue “smurf poo” polishing compound, and it really did make a difference! The ball was visibly glossier and slid over the bearings more easily. It went a long way towards reducing the static friction!
So what about the weight? I couldn't do much about that with the original ball - drilling holes to remove material would slightly compromise the smoothness. So instead, I ordered a replacement ball for a Logitech Cordless Optical Trackman (LCOT). It's a lot lighter than the Ploopy ball at 60g (similar to the slighly larger Microsoft Trackball Explorer ball, which is 65g but larger). This ball really glides over the bearings, compared to the pool ball with its original finish!

This shows that reducing the coefficient of friction and the weight both help the roller bearings feel better, but it's better to do both! Either ball reduced the static friction to an acceptable level. I'd be more than happy to use the trackball with the original bearings with a proper glossy ball. Before that, though, there were a few more avenues to explore!
Static bearings
Most mass-produced trackballs (e.g. Kensington Expert Mouse and Microsoft Trackball Explorer) use static (non-moving) spheres of ceramic material, like silicon nitride or alumina. They provide three hard, low-friction points for the ball to rest on and spin against. They're quite a neat solution, because there are no moving parts other than the ball. The friction between ball and bearings is usually pretty low, but it depends heavily on the surface finish and material of the ball. I wanted to try them out in the Ploopy.
Replacing the bearings in my Microsoft Trackball Explorer left me with a few spare 1.984mm silicon nitride balls. I quickly designed and 3D printed a holder for them, to see how well the ball would spin. Each ball is just pressed into a 2mm hole, which seems to hold them well enough.


With this static bearing tester, either ball spins quite nicely! To properly test it, the bearings needed to be mounted in the trackball. Without being able to move a mouse pointer, you're just guessing.
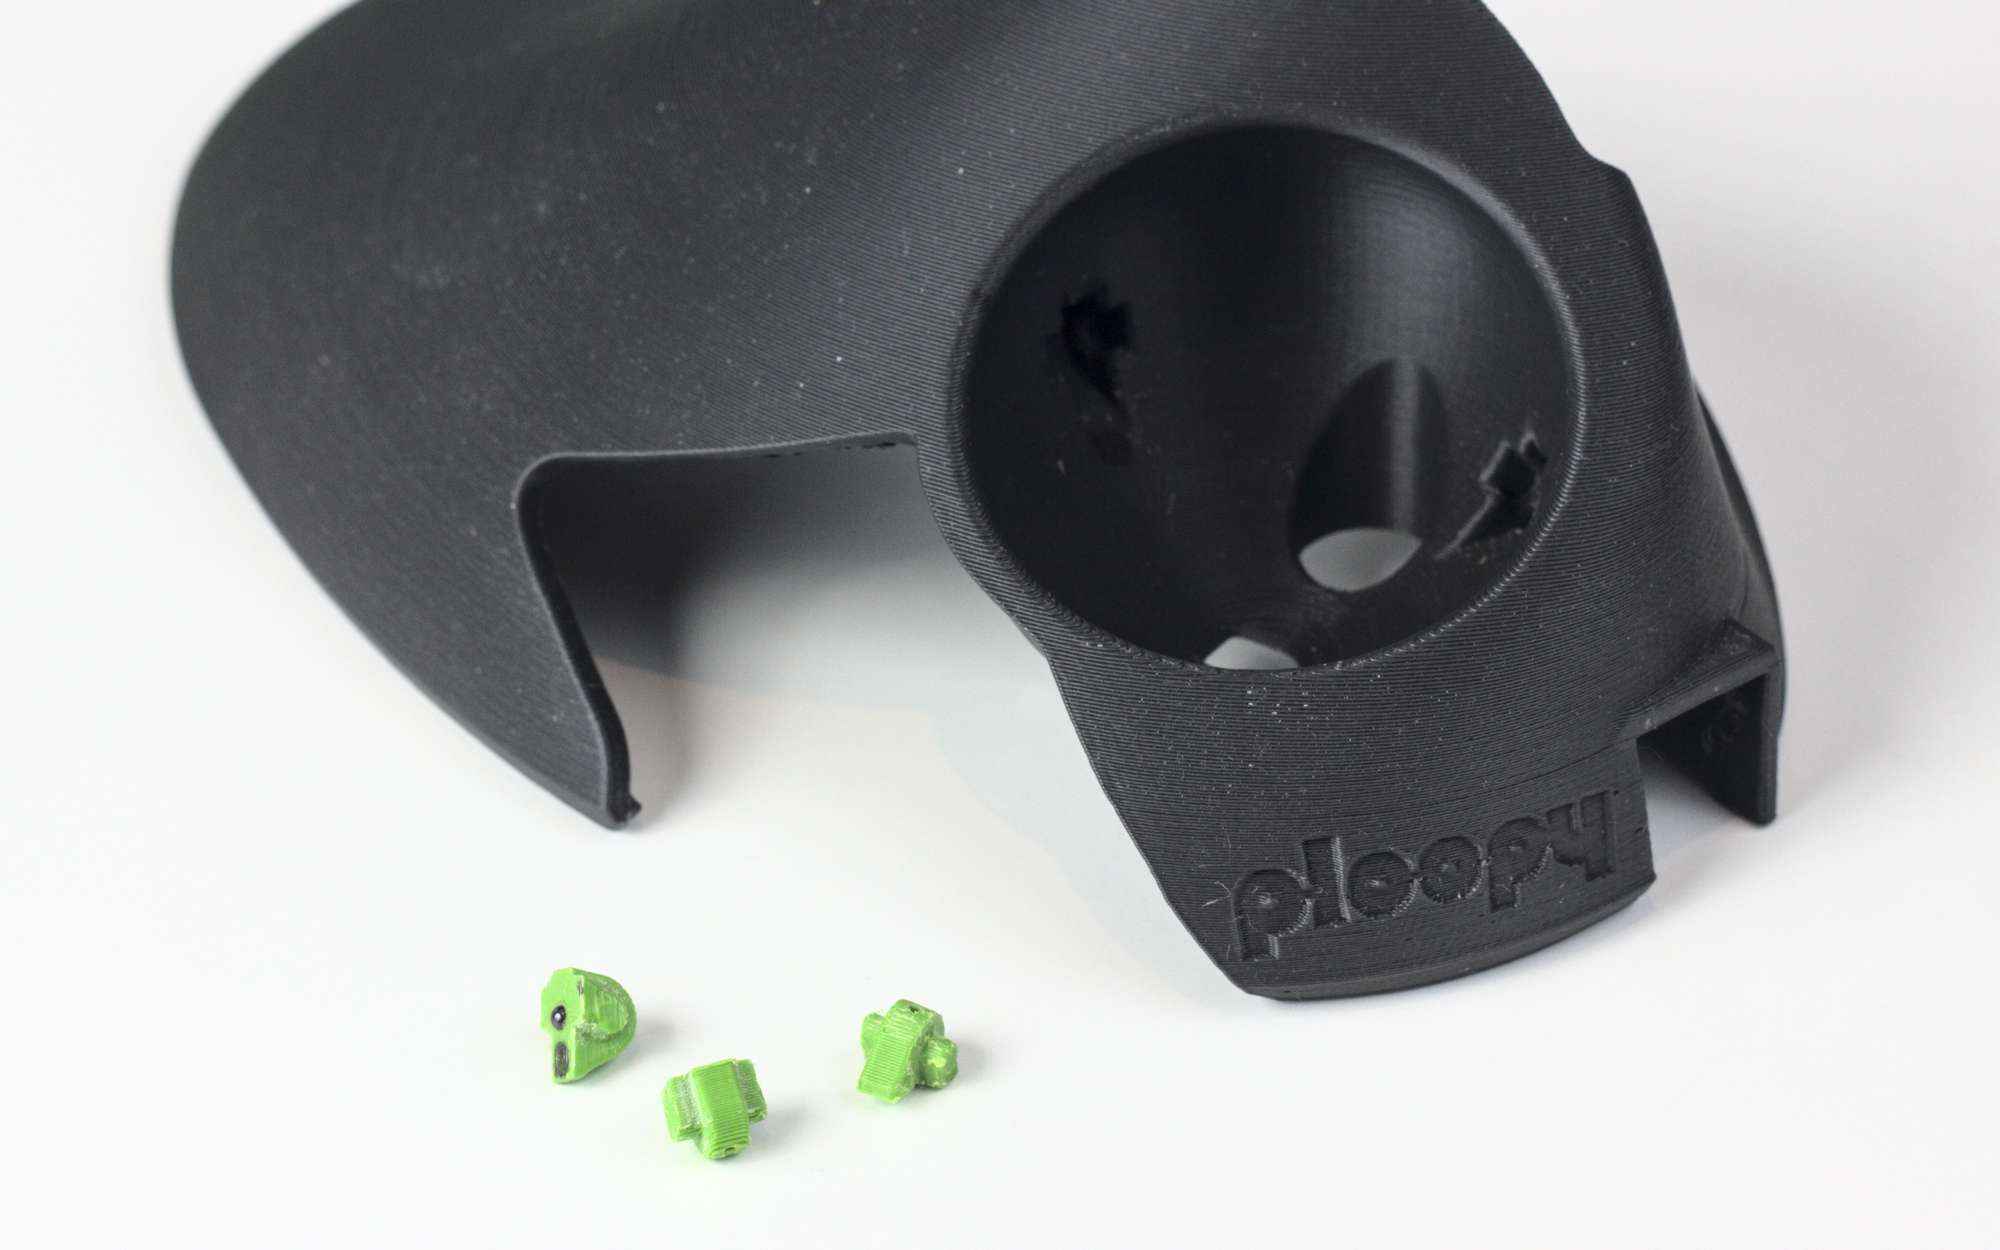
I needed a way to put the silicon nitride balls into the bearing positions in the Ploopy. Importing the STEP file for the top of the trackball into Rhino, I had a quick go at making some adapters to hold the bearings in the right position. If you'd like to try them out, here they are on Thingiverse. Note that they will need some cutting/filing to fit properly.
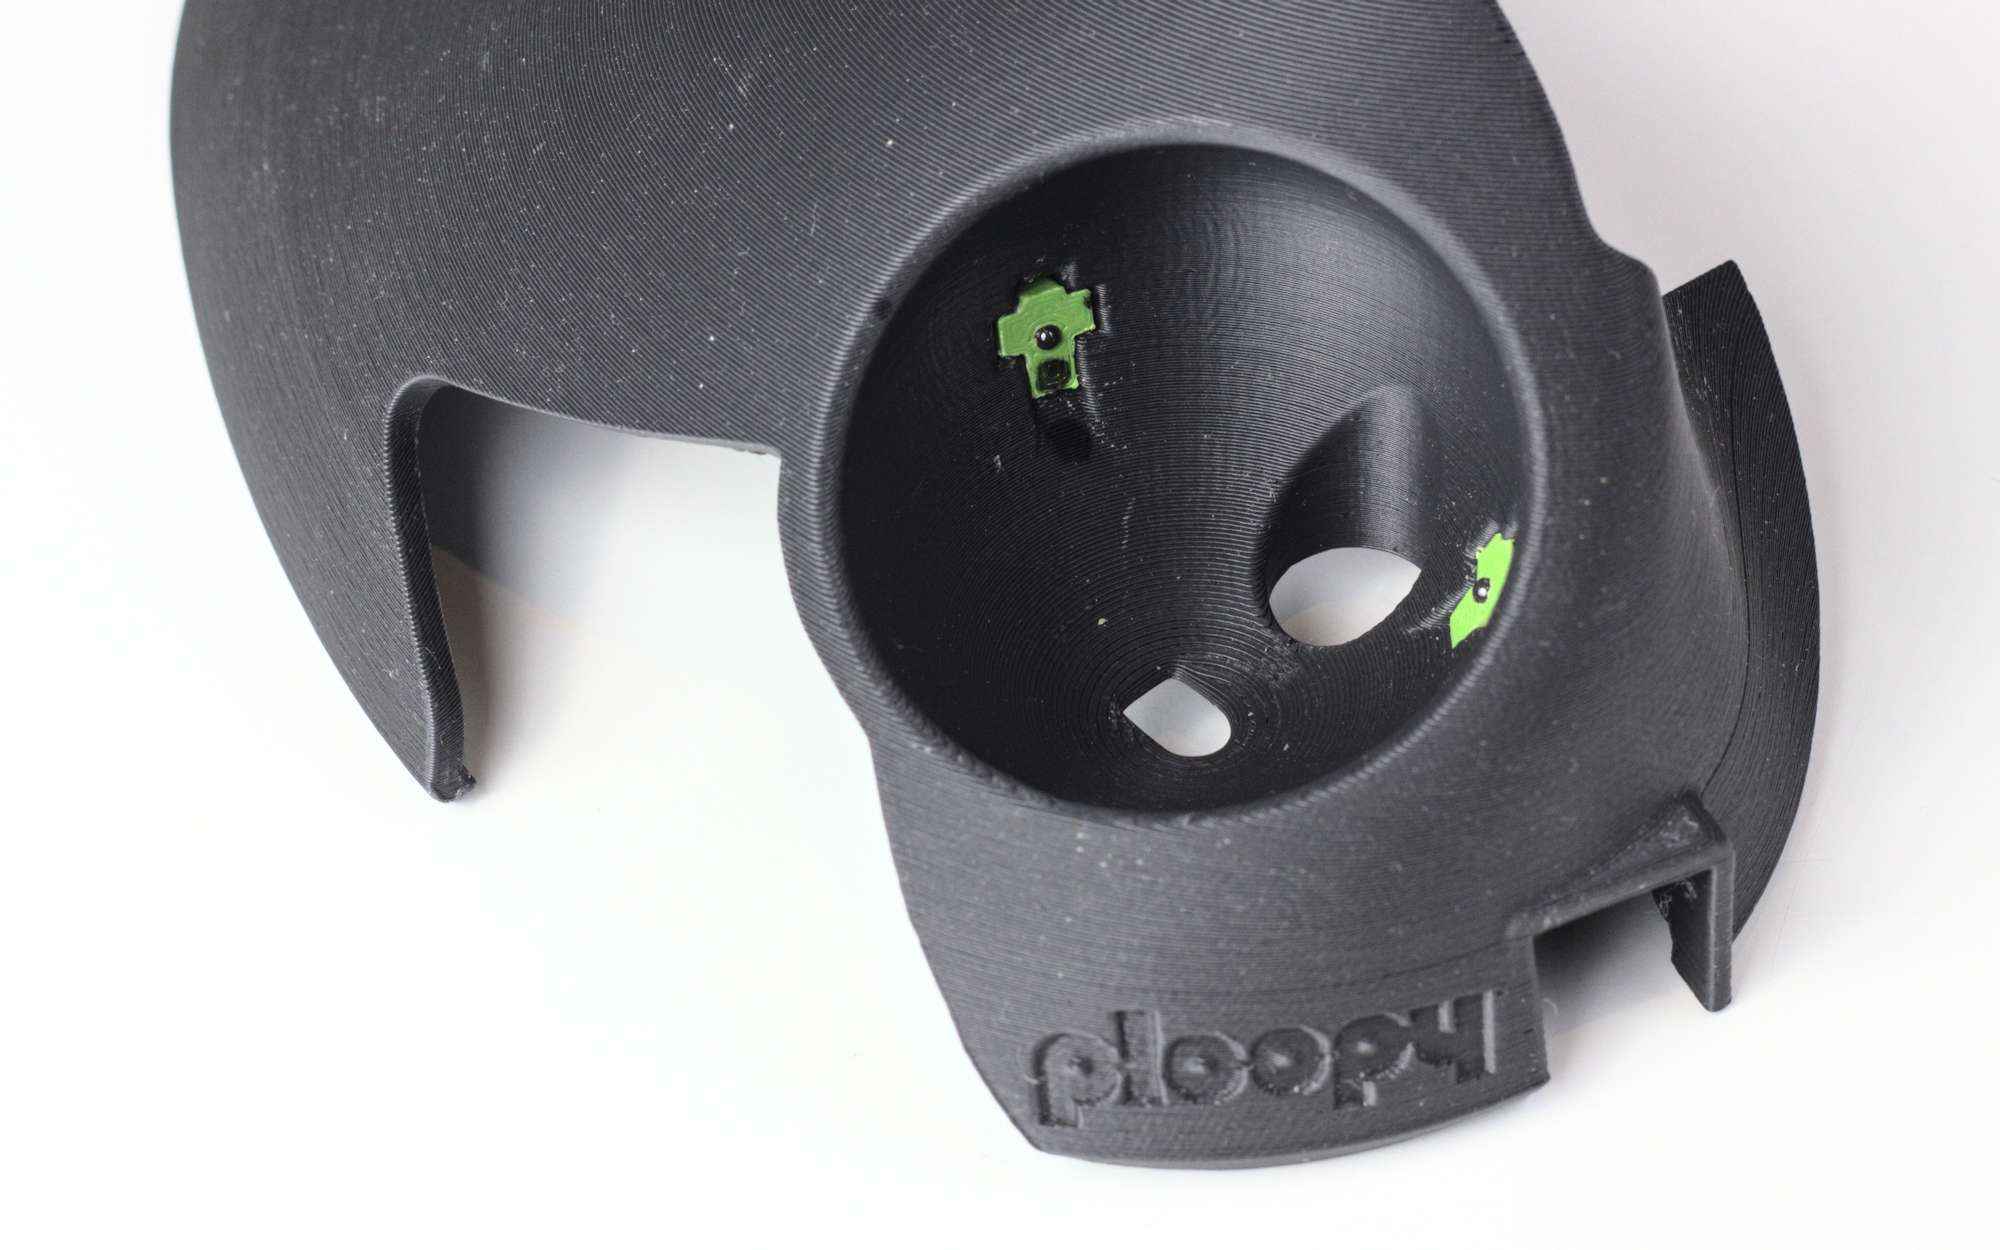
Now I could see how the ceramic bearings felt in the Ploopy. Unfortunately, with the pool ball or the LCOT ball they didn't feel as good as they did in my Trackball Explorer. To me, the roller bearings felt better. The static friction with the ceramic bearings was so high that sometimes it felt like the ball was stuck and had to be broken free. With the right ball material static bearings feel very good, but neither of the two I had felt right.

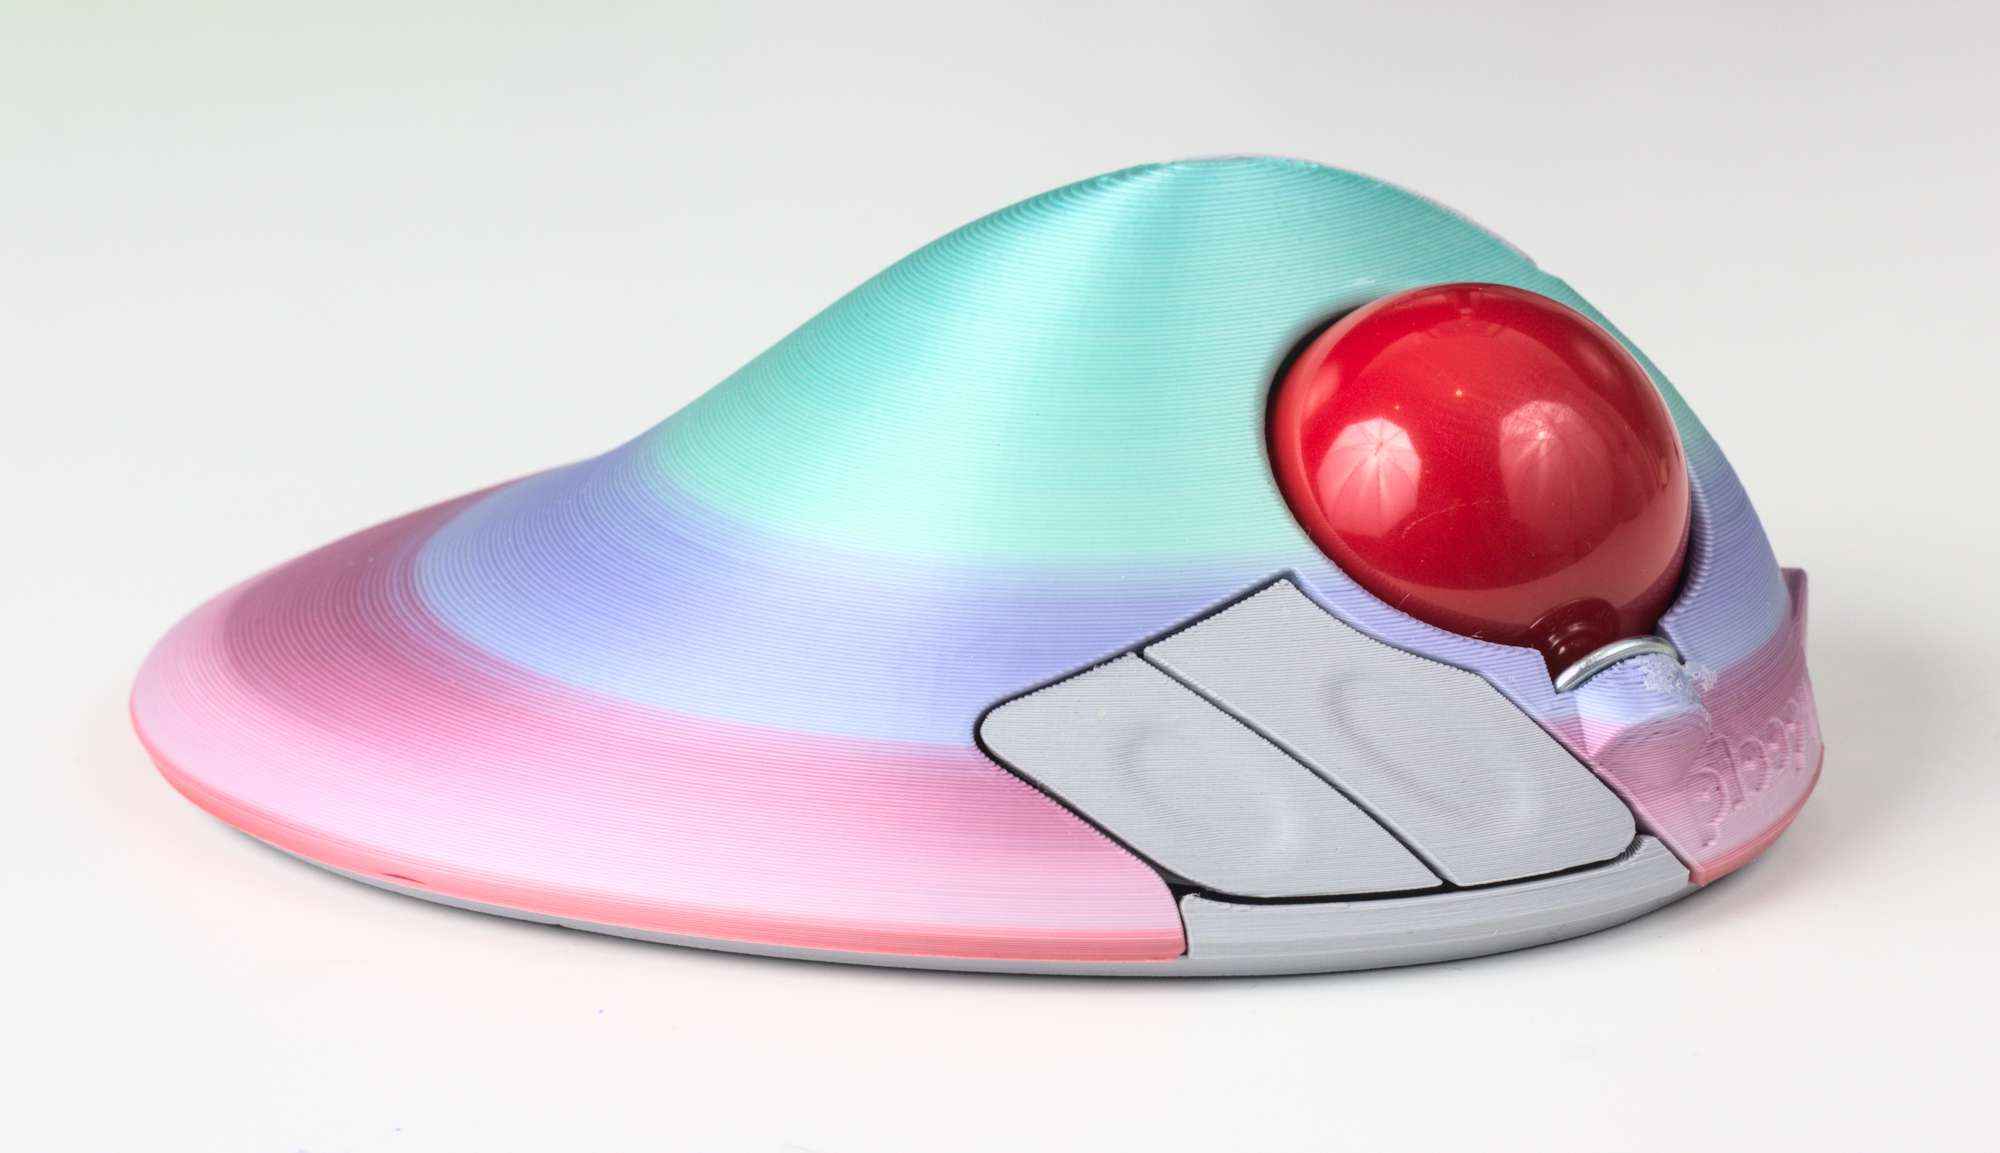
Ball transfer units
Ball transfer units (BTUs) are omnidirectional bearings with one large bearing ball, which is supported by lots of smaller ones inside. They're often used in places where you want to slide things across a surface in any direction. They sound great for supporting the ball of a trackball, which could be moving in any direction. They've even been used in some trackball modifications such as this one by /u/deeproot3d on reddit. So why don't we see them used much (if at all) in commercial trackballs?
It turns out they're pretty expensive, and not necessarily optimised for smoothness. In a small trackball your internal space can be limited, and so you want to use a smaller BTU if possible. 4.8mm ones seem to start at about £12 each, and adding £36 to the cost (not selling price) of your trackball is not great for a manufacturer!
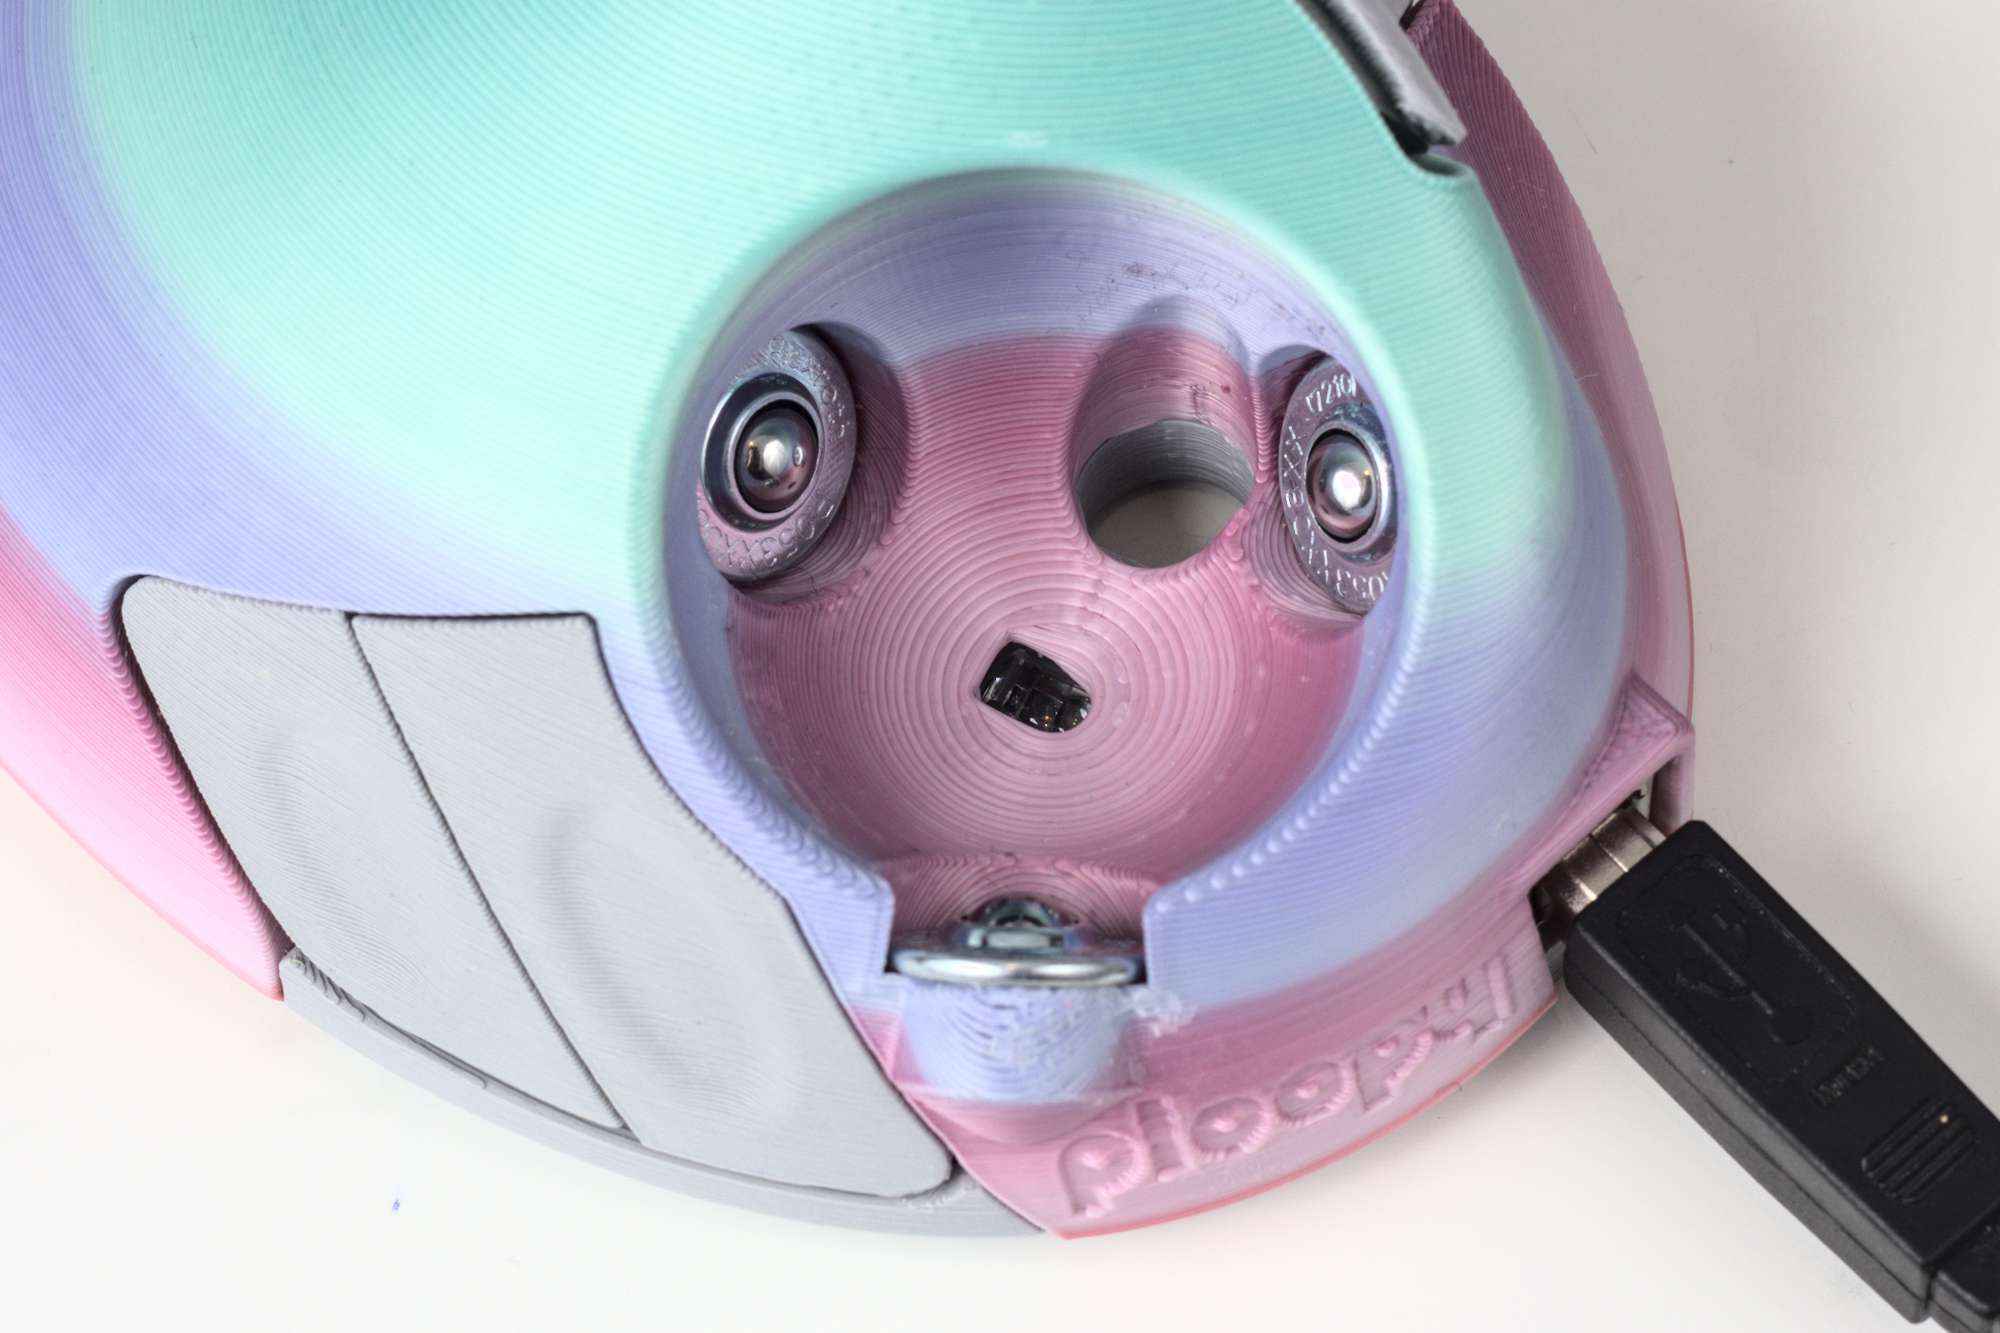
For some hobbyists £36 is fine, but for me it was just above the “impulse buy” level. Luckily, /u/d4baller on reddit was investigating the options. The option we settled on was an 8mm BTU, the Bosch-Rexroth R053010810 (or KU-B8-OFK). Instead of being £12 each, the price is more like £15 for 3 (plus shipping, unfortunately). That was low enough to be worth a try!

Now I knew that the BTU mount holes and angles worked. It was time to try to fit it into the trackball! I made some simple geometry in Rhino to mount the BTUs to the front two mount holes of the Ploopy base.


These holders were basic, but they were good enough to test how it felt! I tried the trackball for a few days with version 2 installed before continuing.


Making it a proper mod
Now I was happy with how well the BTUs worked and the geometry, so I could try merging it into the Ploopy trackball's actual top! I did this in Rhino by importing the STEP file from Github and doing a lot of trimming and extending surfaces. It had been a while since I used Rhino, so this took a while but reminded me why I enjoy it!


It was daunting, but it was now time to try a full print of the version 3 top. The print settings I used were:
- 0.3mm layers
- 20-30% infill
- 60mm/s print speed
- Zigzag supports on build plate ~2.5mm apart
- Support interface enabled
The print took about 12.5 hours, but it turned out well! If I'd remembered, I could have cut off some time by using Ploopy's recommended print settings, particularly the support overhang threshold at 35 degrees. My print ended up much more supported than it needed to be! That was hard to break off and increased the print time a lot (by over an hour!).


Before releasing the project I also wanted to make it more adjustable for people who don't have a CAD tool like Rhino. Ideally this would be OpenSCAD, but the render time was far too long after importing the Ploopy STL file. Instead I chose to use FreeCAD. It's a little more complicated to use, but it allowed me to embed a spreadsheet to define various sizes and angles. That means modifying the design is as simple as changing some numbers in the spreadsheet.


I wanted to make both version 3 and 4 available for people to try out. The creator of the Ploopy encouraged me to make a pull request on GitHub. So I did - here's my PR. That's probably my first open-source contribution! It needs a second PR to tweak the print recommendations and add some of the fancy photos I've included in this article, but I'm proud of it.
Conclusion
In summary, the bearings you prefer will differ depending on what matters to you. If you prefer absolute smoothness, the best option I've found for the Ploopy is to use ceramic bearings. For a lot of people the stock bearings are good enough, but I'd still recommend polishing the pool ball or using a replacement ball as it makes them a lot smoother. For those who want to minimise friction and can handle slightly less smooth fast movements, BTUs are perfect.
Personally, I am really enjoying the BTUs. Compared to my other trackballs, the low friction of the BTUs feels almost weird in a good way! I reduced my pointer speed in the operating system and can now flick the ball a long distance, while getting the extra precision from the lower pointer speed.
If you'd like to try out the BTU mod, check out the repo on GitHub! There's some extra info on where to get the BTUs, as well as printing and assembly tips.